
Optimize your design for excellent result using UiChemy
Optimize your Figma designs for faster, accurate exports to Elementor with UiChemy. Improve structure, speed, and responsiveness easily.

How Design Structure Impacts Export Results with the UiChemy Plugin
A well-organized and structured design can dramatically streamline your workflow when using the UiChemy Plugin. By adhering to best design practices, you can save up to 80-90% of the time typically spent on exporting and adjusting your results. On the flip side, a poorly structured design can lead to inefficiencies and frustration, significantly slowing down the process. Proper design structure is key to maximizing productivity and ensuring a smoother, more effective export experience.
Poorly Structured Design
 Figma
Figma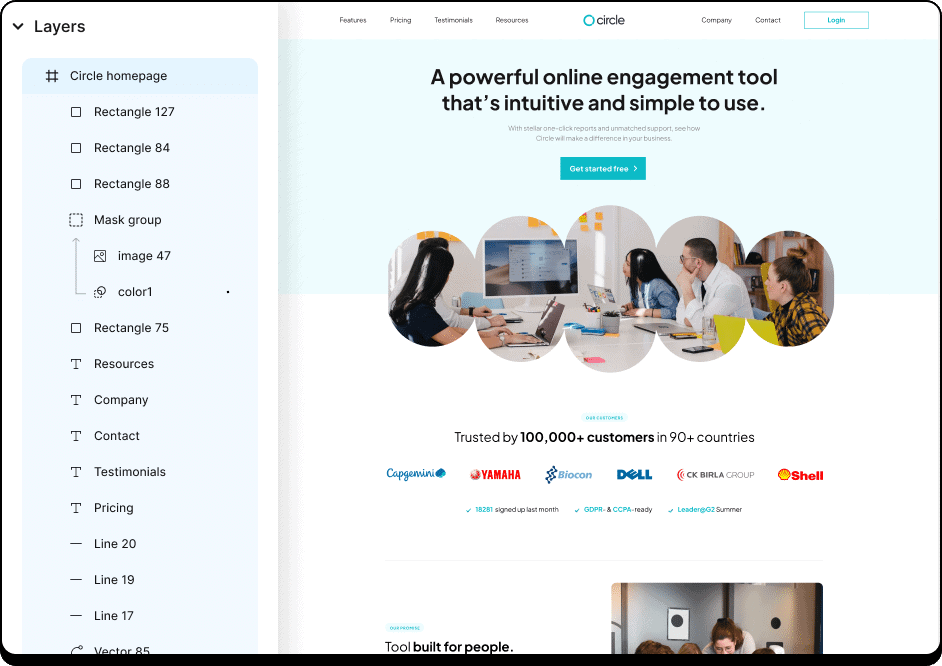
- No Layer Grouping
- No Micro Auto-layout
- Media Not Optimized
- Unnecessary Elements in One Frame
- No Locking of Masked Frames
 Elementor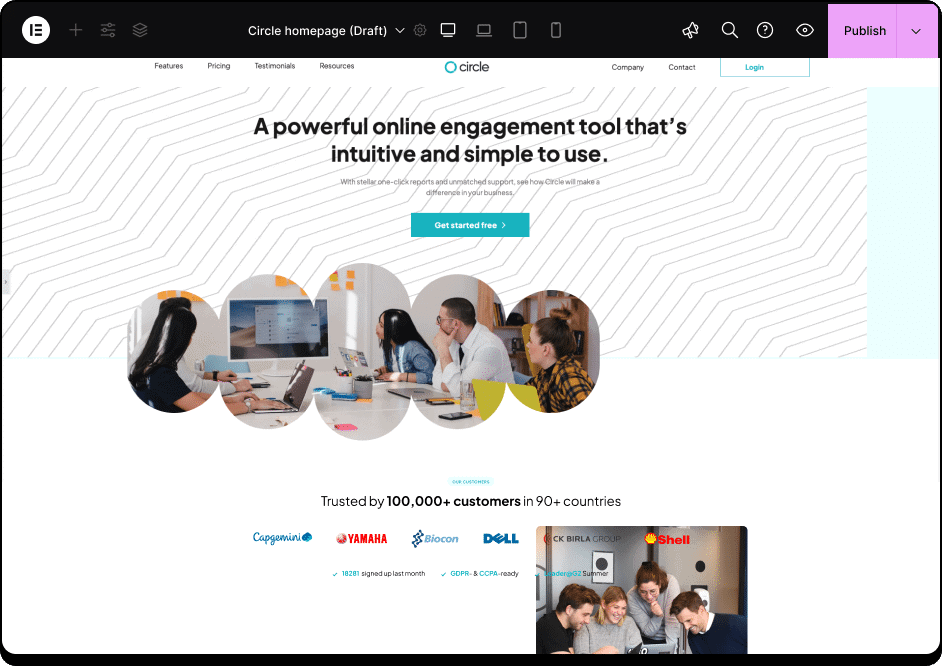
- This results in a cluttered and misaligned design. Without following the recommended steps to optimize the design before conversion, the final result fails to accurately reflect the original Figma structure.
Well Structured Design
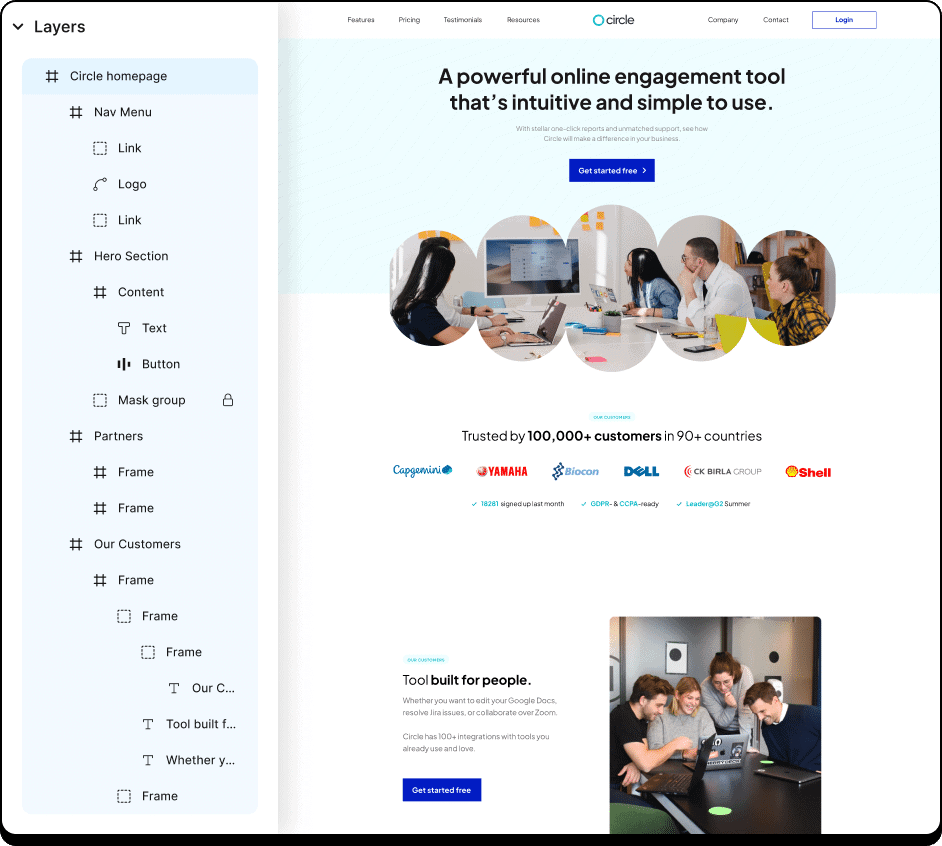
- Proper Layer Grouping
- Applied Micro Auto Layout
- Media Fully Optimized
- Only Essential Elements in Each Frame
- Locking of Masked Frames

- By addressing key design issues, the Figma to Elementor export was excellent.
- The design remained well-structured and aligned, requiring minimal modifications for responsiveness. Thanks to careful optimization before conversion, the final result accurately reflected the original Figma structure, ensuring a smooth process with excellent results and very few adjustments needed.
Fix Slow Figma Exports: Lock Layers to Improve Upload Speeds and Site Efficiency
Unlock a smoother design export process by locking multi-layer groups, frames, and masked elements in Figma. With the UiChemy Plugin, any locked layers, groups, or frames (whether they’re masked, made of images, or small vector elements) will be automatically converted into an image upon export. This feature is perfect for groups of images, vector-based compositions, or complex frames, ensuring a clean, efficient export without unnecessary layers.
When locking is not applied, designs can take too long to upload, and sometimes fail to upload altogether, leading to missing images, slower site performance, and unnecessary strain on storage. This inefficiency can even contribute to lower site rankings and a frustrating user experience. By locking and exporting your layers as images, you’ll reduce loading times, keep your site optimized, and prevent storage issues, all while improving the overall performance and user experience.
Ignoring Lock on Masked Groups and Vectors
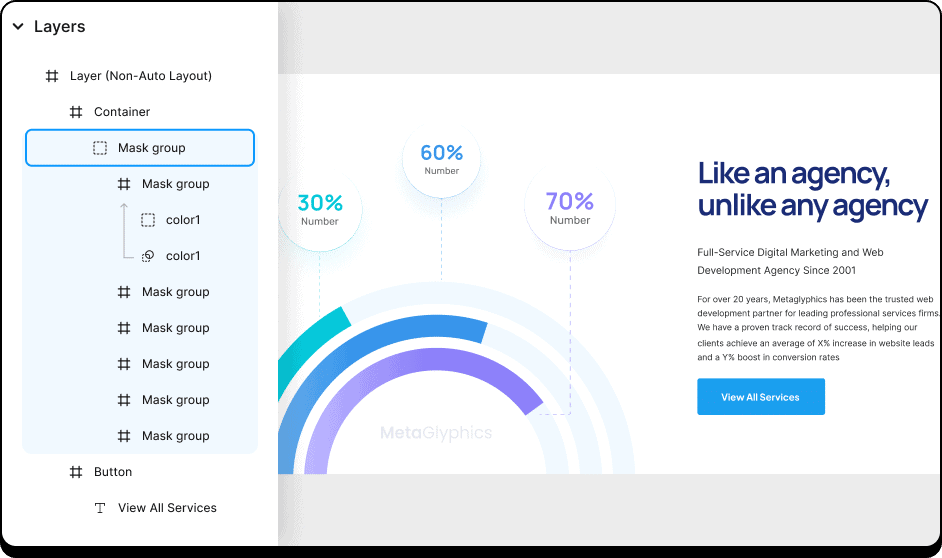
- Not applying the locking to masked groups, where the layout is structured with nested groups, frames, and masked elements.
- The highlighted Mask Group contains multiple layers, including small vector elements and images, all arranged to form a unified visual composition.
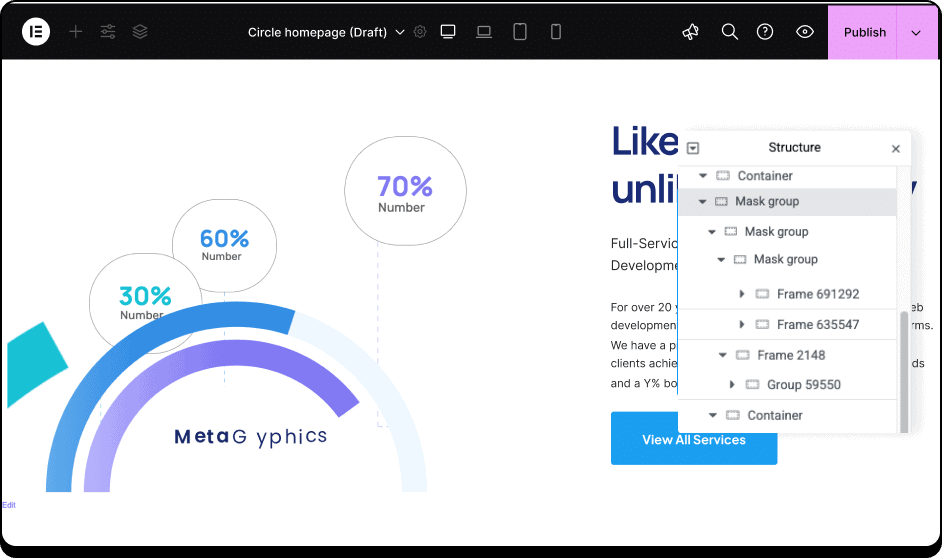
- The result of exporting the design without locking the layers in Figma shows that the nested groups and frames are converted into multiple individual containers and image elements. This leads to a cluttered and mismatched appearance, deviating from the original Figma design.
- The export process took considerably longer, and the design is not responsive. Furthermore, managing these elements in Elementor became more challenging and time-consuming due to the disorganized layout.
Apply Lock on Masked Groups and Vectors
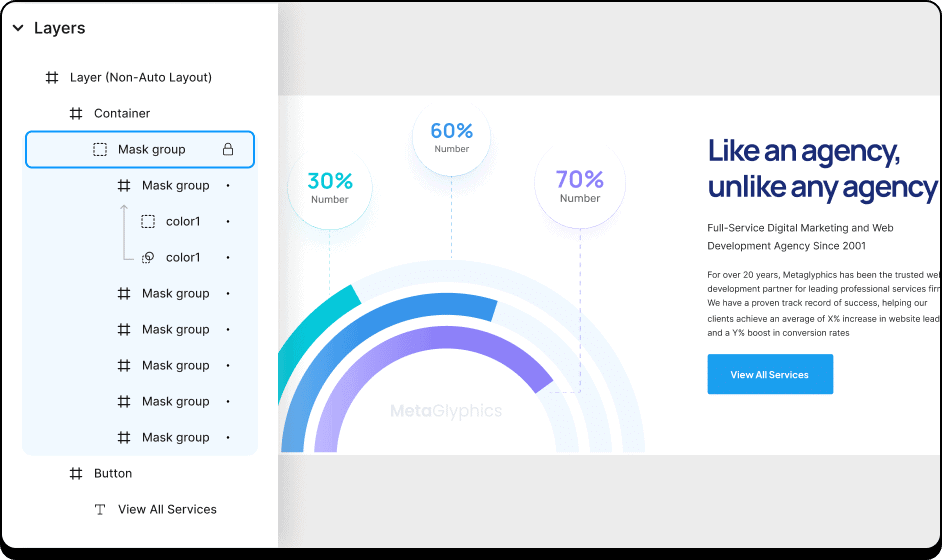
- Applying the locking to masked groups, where the layout is structured with nested groups, frames, and masked elements.
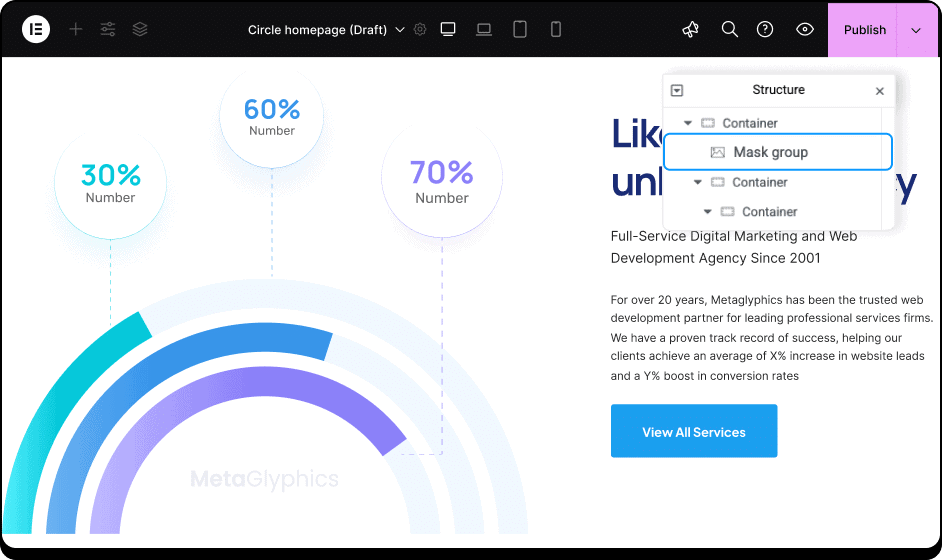
- Locking the layers in Figma before exporting combines the nested groups and frames into a single image element.
- This results in a clean and accurate reproduction of the original design, keeping its intended structure intact. The export process is faster, and the design remains responsive.
Avoid using Fixed Height to Text Elements
Fixed height is often used in Figma for text elements to create bottom spacing, but this approach doesn’t work well with Elementor, especially since Elementor doesn’t support text height in the Heading widget. If the text height changes, it can overlap neighboring elements, which may lead to absolute positioning being used as a workaround. This is not an ideal practice, as it makes the layout more rigid and harder to adjust or resize.
Don’t Use Fixed Height for Text Elements
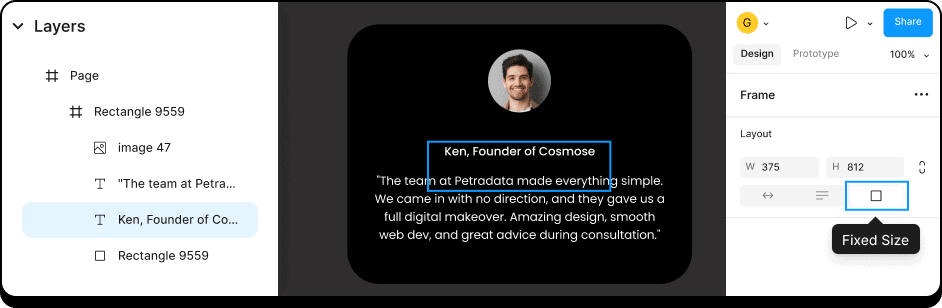
- Fixed Height Applied to Text
- Managing the Bottom Spacing with Text Height
- Overlapping with Neighboring Elements
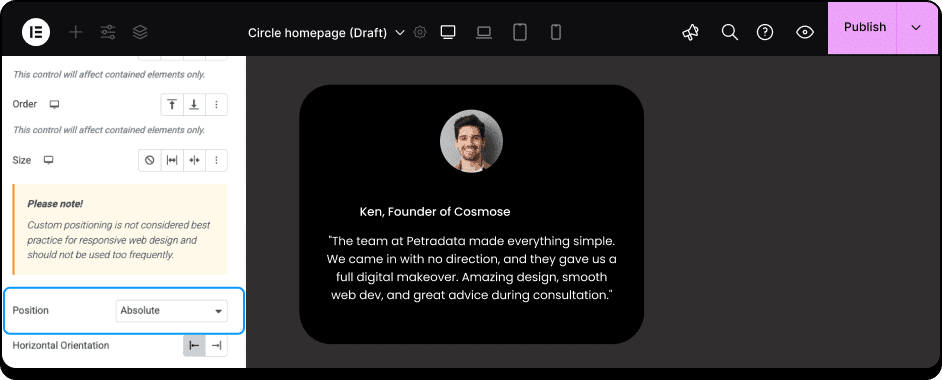
- Ignoring these issues causes text elements with fixed height to be set to absolute position in Elementor, as they overlap with neighboring elements. This disrupts the layout, requiring manual adjustments to set the positioning back to relative for proper alignment.
Do Use Auto Height for Text Elements
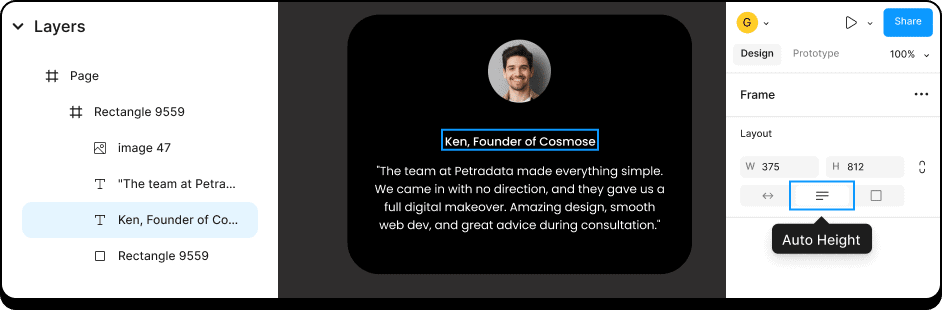
- Auto Height Applied to Text Element
- Managing Bottom Spacing with Gapping
- Preventing Overlap with Neighbour Elements
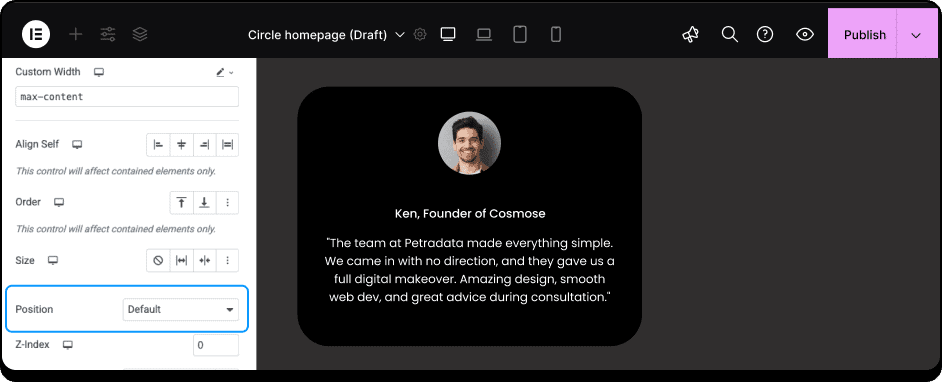
- By setting the text height to auto height, the layout becomes more flexible and adaptive. This ensures that the text elements adjust automatically based on the content, preventing overlap with neighboring elements.
- As a result, the design remains responsive, and no manual adjustments are needed to fix positioning, allowing for proper alignment and a cleaner, more efficient layout in Elementor.
Dealing with Slow Conversion Imports: Causes and Solutions
When your design includes numerous elements, vectors, shapes, and images, importing to Elementor using the UiChemy plugin can take a long time. Oversized images are one of the main reasons for slow imports or failed imports. Additionally, a slow internet connection can contribute to delays. Another common cause of slow imports is improper layering and the failure to lock layers in images, vectors, and masking groups, which can hinder the import process.
To speed up the import, consider optimizing your design by grouping layers properly, locking masking layers, and compressing image sizes. Ensure your site has sufficient storage space and a stable internet connection. These steps will help make the import process faster when using the Live Import export method.
For larger designs, try breaking them down into smaller sections and export these sections using the Copy to Clipboard export method. This approach is simple, convenient, and can significantly improve the speed of your imports.
Importing unoptimized, lengthy designs with high-res images
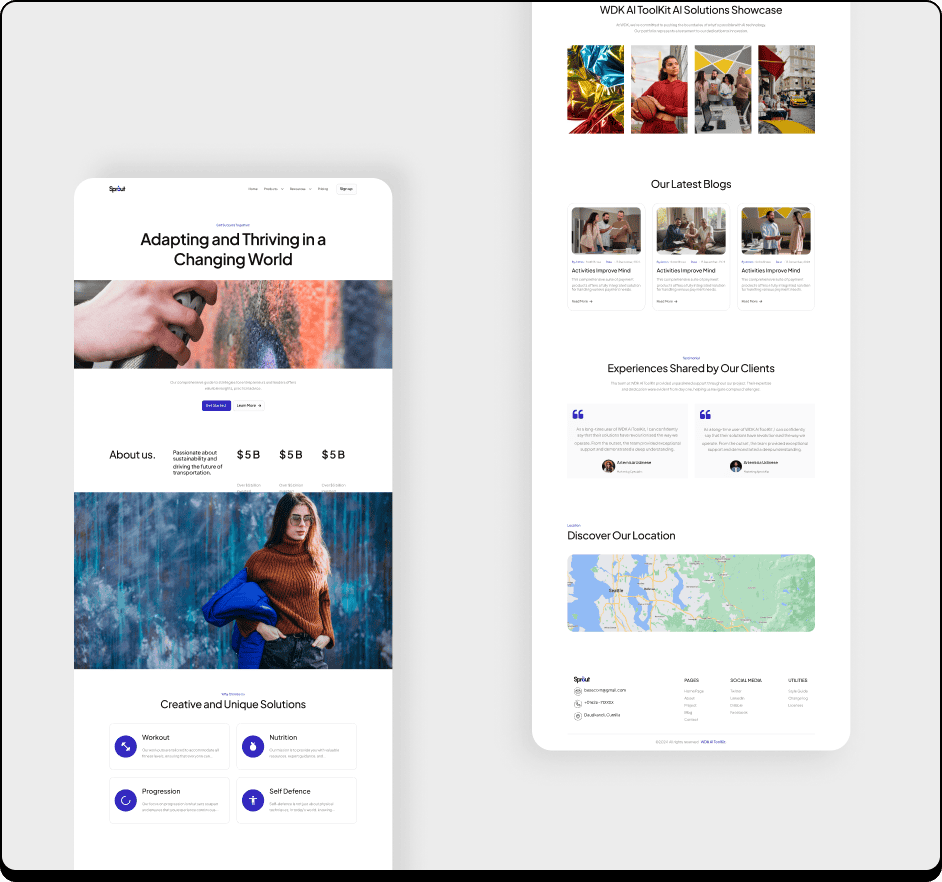
- Larger designs with many elements, vectors, shapes, and images
- Oversized images
- Slow internet connection
- Ignoring locking layers in images, vectors, and masking groups
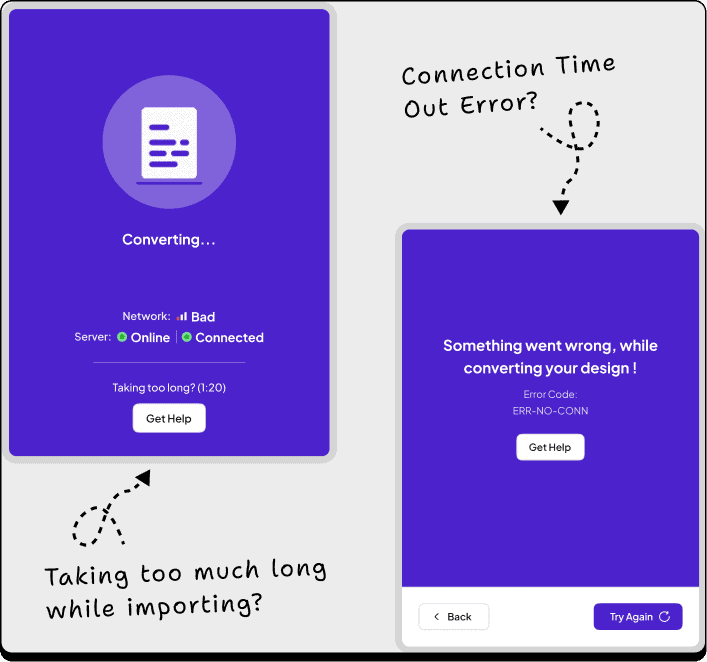
- Importing the design without addressing the points above results in connection timeout errors, missing or failed image uploads, and in some cases, the import process takes too long and becomes time-consuming.
Efficiently Handling Compact Designs with Compressed Images
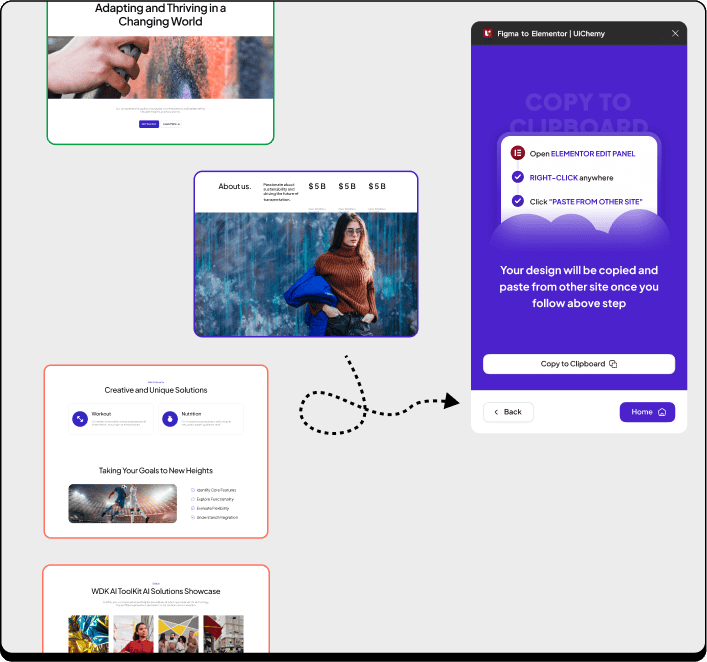
- Splitting larger designs into smaller sections
- Importing smaller sections with the Copy to Clipboard export method
- Compressed Images
- Stable internet connection
- Proper layering
- Applied locking layers in images, vectors, and masking groups
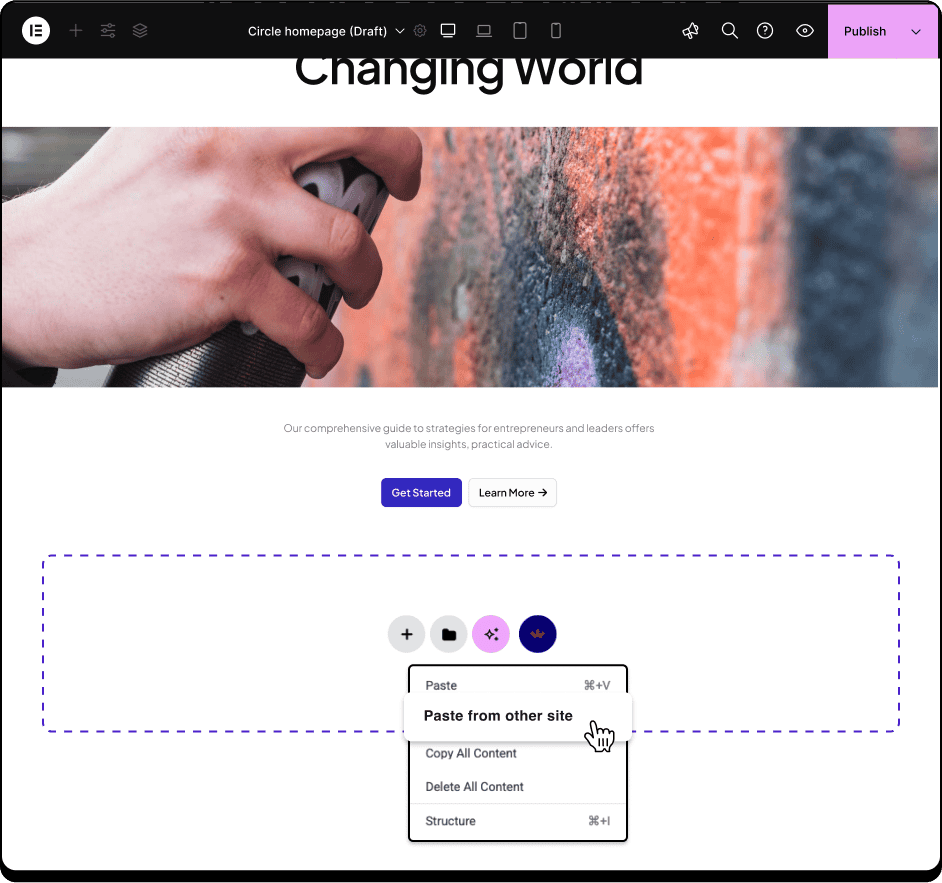
- By addressing all the mentioned issues, such as optimizing the design, compressing images, and properly organizing layers, the import process became much smoother. The larger design was split into smaller sections, and the Copy to Clipboard export method was used to import these sections into Elementor using the ‘Paste from other site’ option. This approach was quick, easy, and significantly improved the import speed.